
Create is where you generate. Each tab is a mode with its own inputs and models, but every mode works the same way: load inputs on the left, choose a model on the right, write the prompt in the middle, and generate.
Some modes have several input modes of their own, picked at the top of the settings panel: Video has Text to Video, Start Frame, References and more. Each mode page explains them.
Choose a model
The model card at the top of the settings panel shows the current model. Click it to open the picker: every provider, every model, and a short description of each. The settings below the card change with the model, so you only ever see the options it supports.
Each mode starts on a default model, marked on its page. The models reference lists them all.
In the modes that make images, Model Batch runs the same prompt on up to four models at once, one result each. It is the quickest way to see which model suits a brief.
Write the prompt
The prompt bar sits under the working area. Press Enter to generate, and Shift+Enter for a new line.
- Snippets. Type
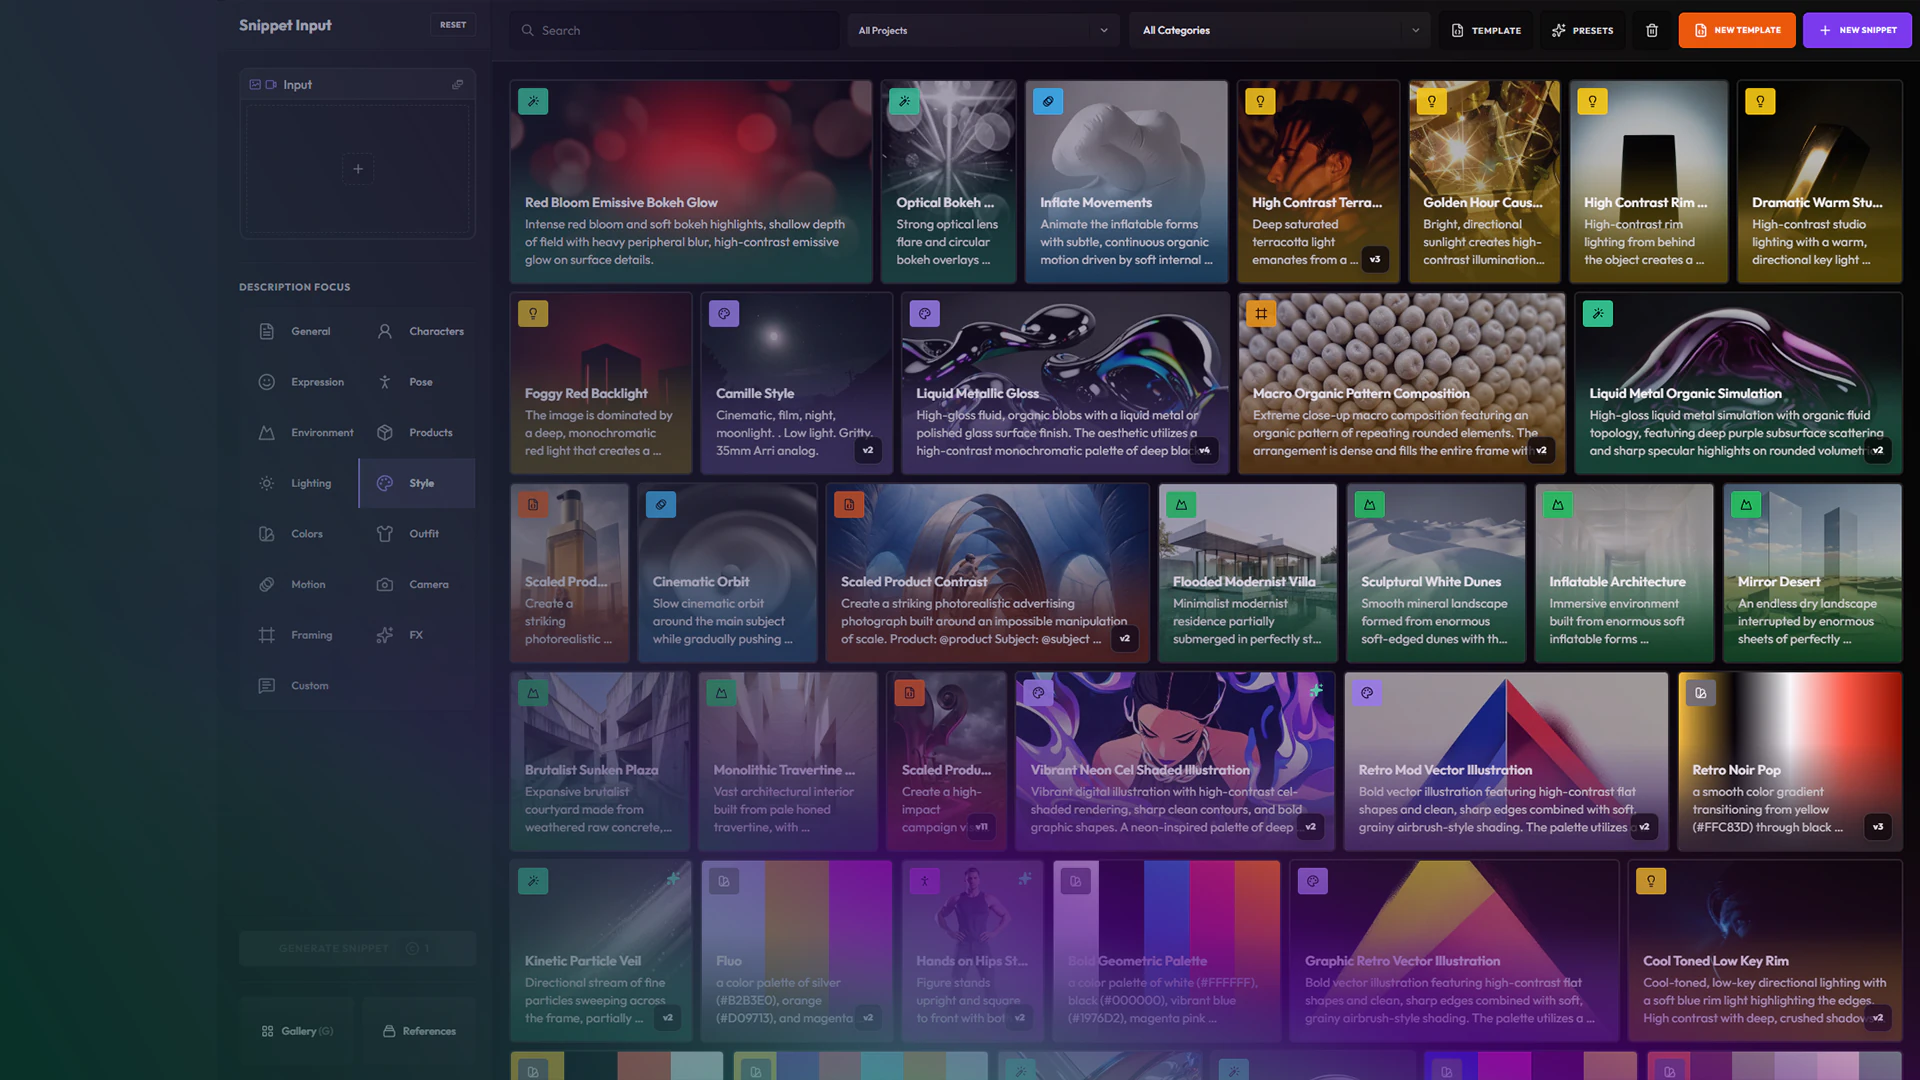
@to insert a snippet: a saved piece of prompt for a character, an outfit, a framing, a light setup and so on. Each category has its own color, so a long prompt stays readable. - Input tokens. Loaded inputs have names such as
@image1or@character1. Use them to say what each input is for. - Variables. Write
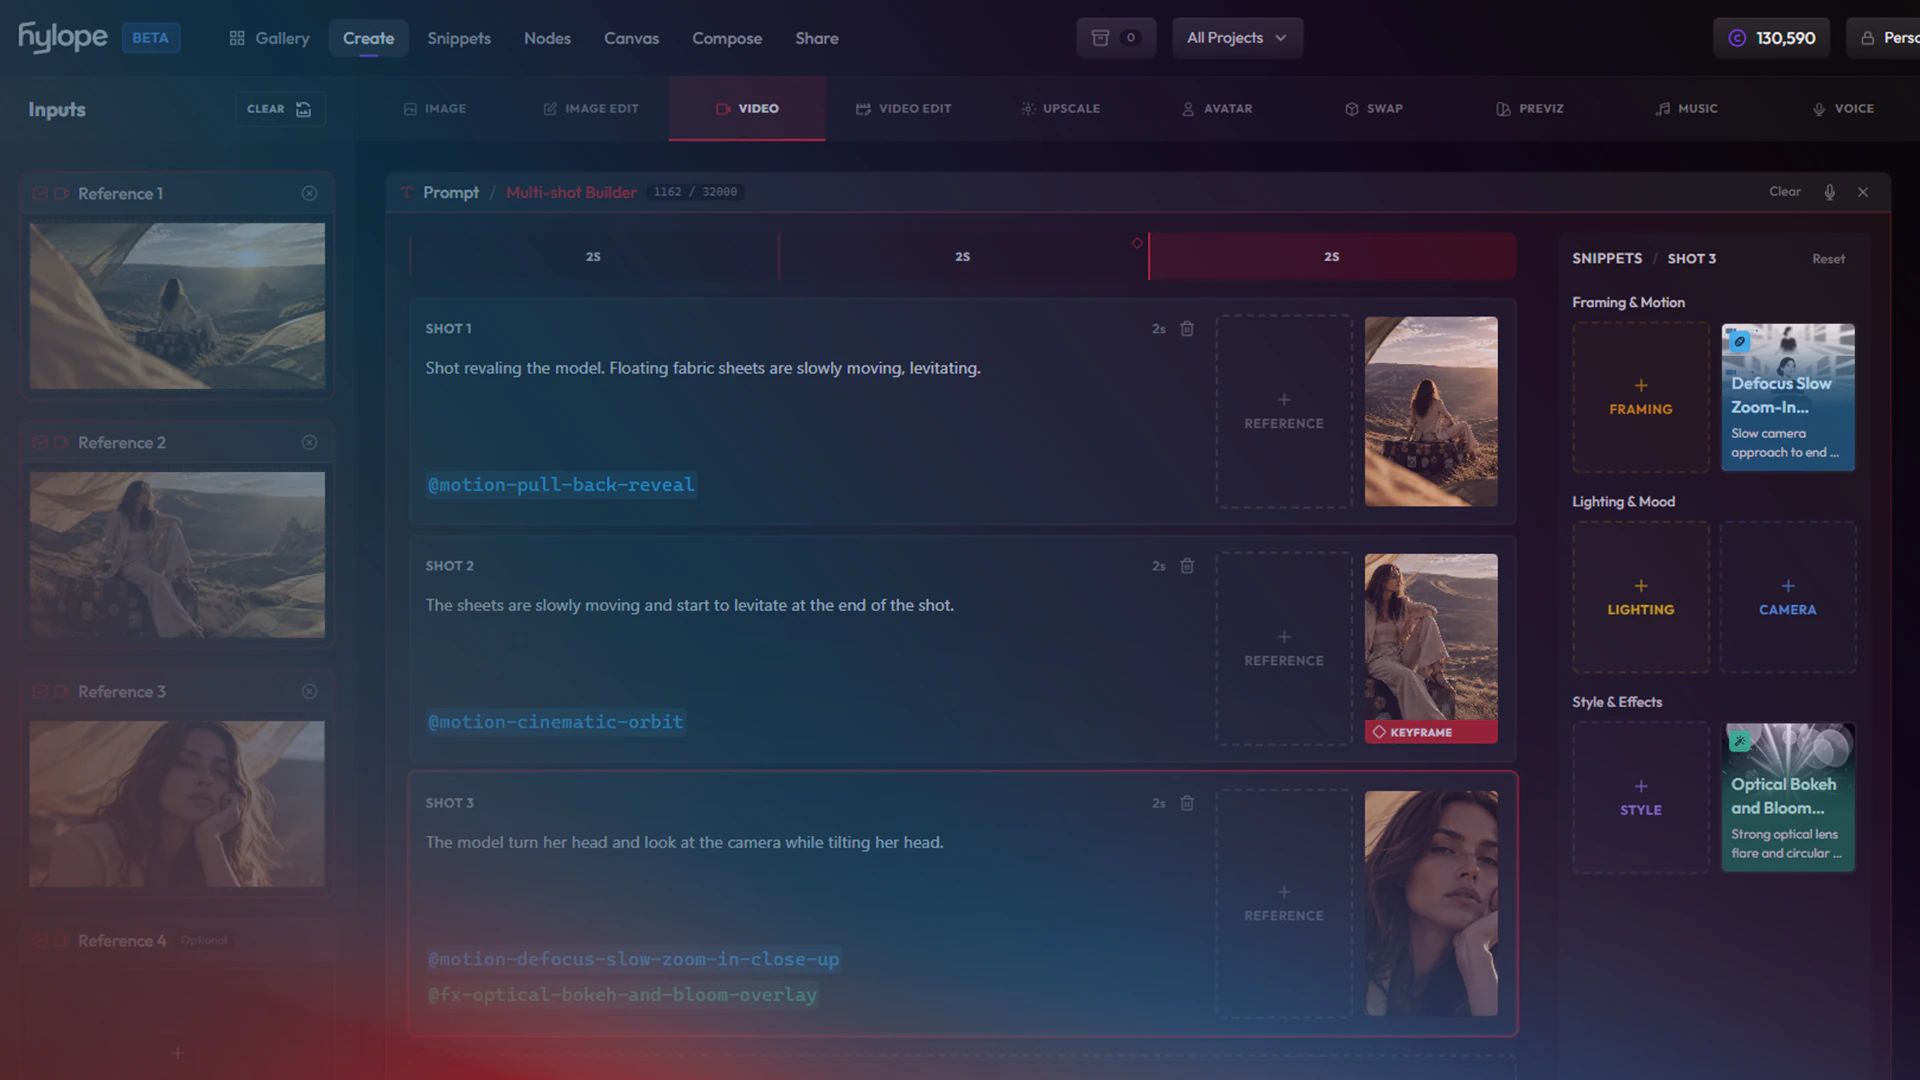
@variablein the prompt and give it up to ten values: Hylope makes one generation per value. - Prompt Builder. Builds the prompt from blocks. Some modes have their own builder: shots on a timeline for multi-shot video, song structure and lyrics for Music, character details for Avatar.
- Improve prompt rewrites your prompt with the selected model’s best practices, and Revert brings yours back. Grammar fixes spelling and grammar, Translate to English translates it.
- Voice input. Click the microphone and speak your prompt.
The bar also counts the final prompt, snippets included, against the model’s character limit.
Load inputs
Inputs go in the panel on the left. Each mode names its slots: Source, Style Reference, Start Frame, Scene Photo and so on. Fill a slot by dropping a file, picking from the gallery, dragging from the Shelf, or choosing a key asset.
When an input cannot be used by the selected model, the card says why, and the input stays loaded. Switch to a model that accepts it and the card clears.
Output settings
The pills in the prompt bar set the output. Each one only offers what the model supports.
| Setting | What it does |
|---|---|
| Ratio | The aspect ratio of the result. |
| Size or Resolution | From 1K to 4K for images, from 360p to 4K for video, depending on the model. |
| Duration | Video and audio length. |
| Batch | How many results to make in one run: 1, 2 or 4. Available on Basic and above. |
| Seed | Random gives a new result each time. Fixed reproduces the same result from the same prompt and settings, so you can change one thing at a time. Only shown for models that accept a seed. |
Contact Sheet Variations, in the settings panel of the image modes, lays several variations out in one image: from the prompt, or by angle, pose, time of day, weather or lighting.
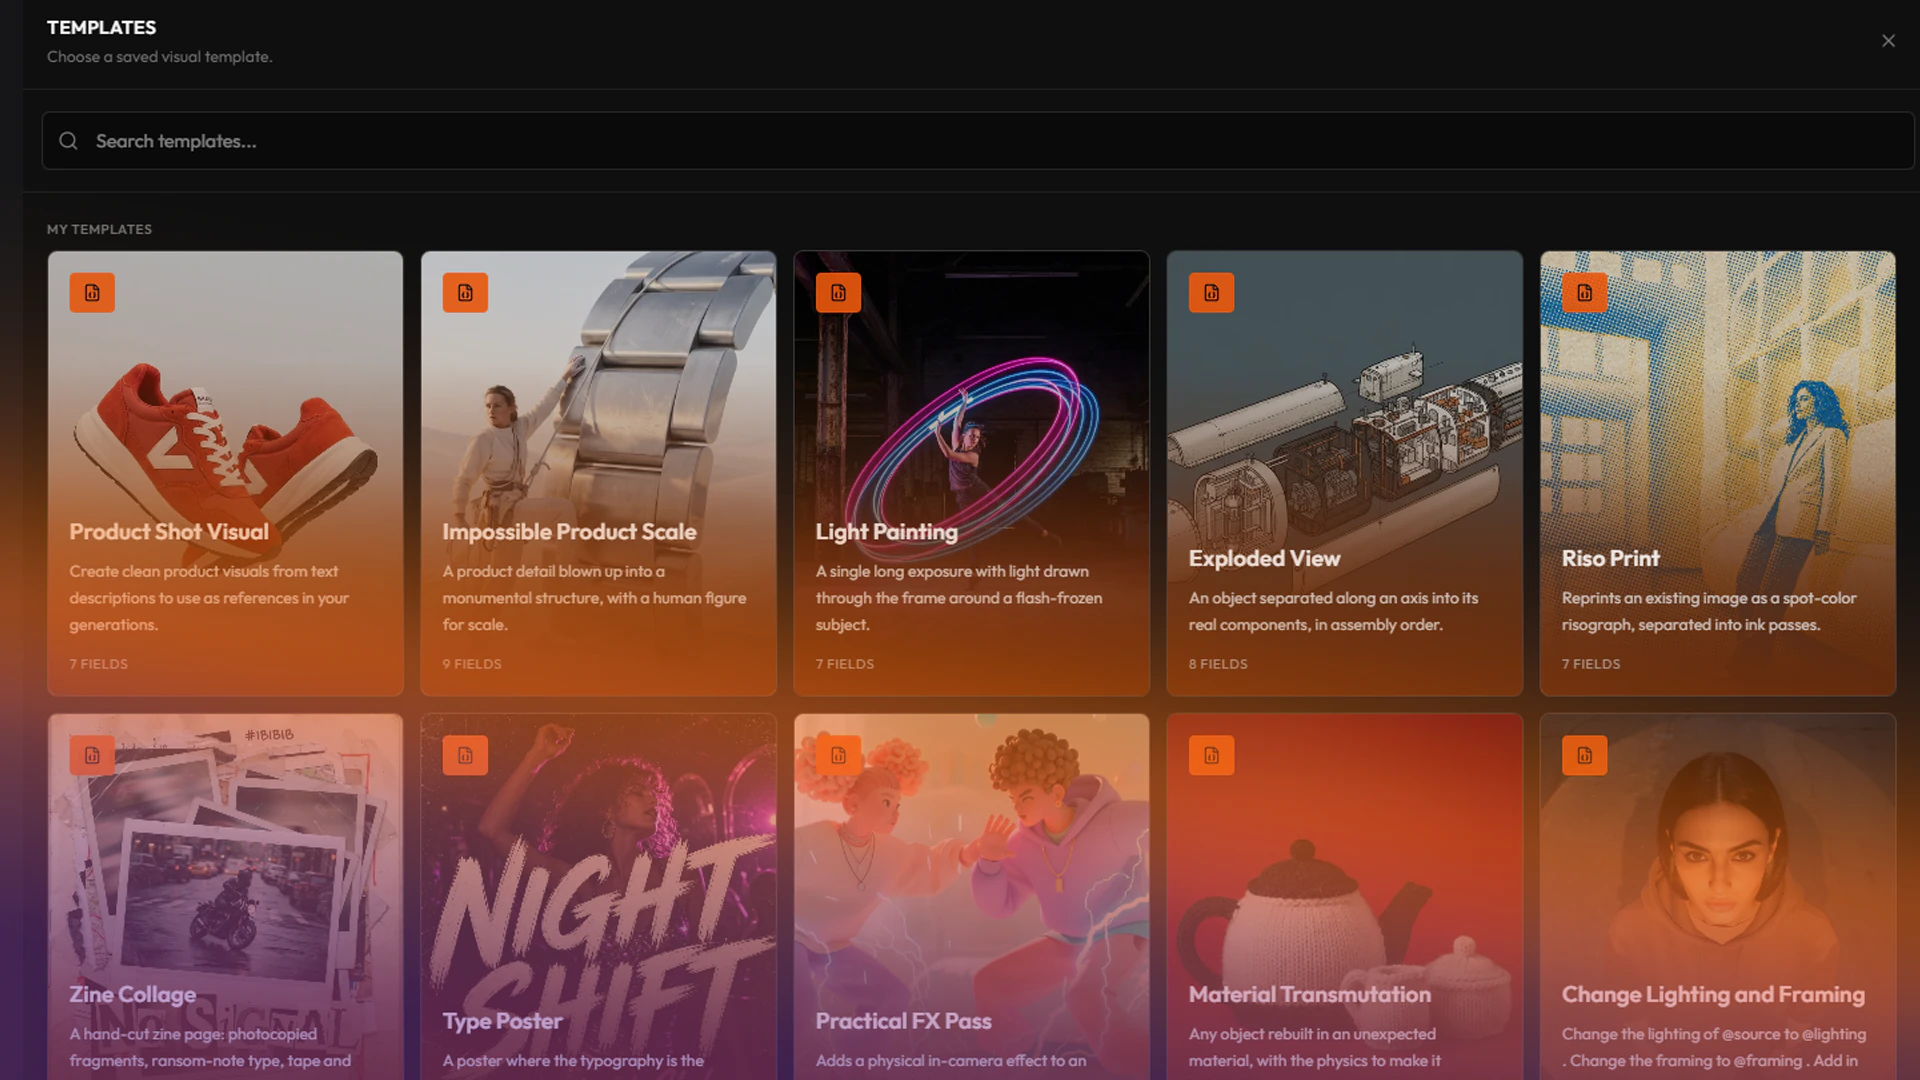
Template, in Image and Image Edit, fills the prompt from a template: the art direction stays fixed and you only change its open fields.
Generate
Generate shows the credit cost of the run before you click. The job appears in the working area at once and fills in when it is done.
- Your plan sets how many jobs run at the same time. If you reach the limit, wait for a job to finish or upgrade.
- You can cancel a job while it runs. A cancelled or failed generation is not charged.
- Some video models offer Draft: a quicker, cheaper render you can Finalize later at full quality.
Find and reuse results
Results appear in the working area, in the strip of recent results along the bottom, and in the Gallery.
- Press G to open the full gallery over Create.
- Hover a result and press Space for a quick look, or P to see its parents.
- Open a result and press R to reload its settings into Create.
Learn more
TutorialGetting Started26 min
Create your snippets library
Trade paragraph prompts for a color-coded library of character, wardrobe, framing, lighting, and FX snippets, then reuse it across Create, Image Edit, templates, and nodes.
TutorialCreative Workflow18 min
Create your own templates
Turn a prompt that works into a template: the art direction stays locked, and a few fields stay open for you or your team to change.
TutorialVideo16 min
Prompt multi-shot videos with a visual editor
Plan a multi-shot video on a visual timeline: one card per shot, each with its own reference image and camera motion.